How can you gamify your opt-ins on your website? If you’re curious about adding Spin-to-Win opt-ins to your WordPress, WooCommerce, or Shopify website then you are in the perfect place!
Spin-to-Win opt-ins are the perfect way to offer perks, discounts, and special offers as a reward to your visitors. Gamification increases engagement, opt-ins (sometimes by up to 30%), and sales – oh, and it’s super fun too!
In this tutorial, I’m going to show you how to add a Spin-to-Win opt-in to your WordPress website, and yes this will also work for Shopify too! We’ll do this using one of my favorite tools (in fact, it’s the same tool where I showed you how to grow your email list with content locking!), and yes, it’s the same people that brought us RafflePress (check out my RafflePress review).
What Is A Spin-to-Win Gamified Opt-in?
Have you ever seen that show “The Price is Right?” You know, the show that has that giant spinning wheel on it? The show has captivated the attention of audiences for decades, and now you get to bring that fun to your website!
These Spin-to-Win opt-ins add a fun game-like way for people to engage with your website while getting something for themselves! It’s kind of like bringing Las Vegas slot machines to your website, without all the legal issues!
The way these opt-ins work is by first requiring your visitor to enter in their email address to get a chance to spin the wheel. In a way, they’re kind of like a multi-step pop-up opt-in, but in reverse. Once they’ve opted in, they get to spin the wheel. Whatever section it lands on will automatically reward them with whatever coupon code you configured.
What Can I Give Away With A Spin-to-Win Opt-in?
Your imagination is the limit, but to give you a few ideas, here are just a few of the things you can give away with this type of opt-in:
- Discount codes
- Free shipping codes
- Content upgrades
- Lead magnets
- Free products
- Free trials
- Gift cards
If you’re ready to add some fun to your old, boring opt-in experience, then make sure you continue reading, because we’re about to go through all of the steps!
Step 1: Get OptinMonster Setup
Click the button below to open up OptinMonster and create your account. You need to select the “Growth” plan to get access to the Gamified “spin-to-win” style campaigns.
WordPress Instructions
Once you have that, go into your WordPress dashboard, and install and activate the OptinMonster plugin by simply searching for OptinMonster. If you’re on Shopify, then you can skip the plugin step.
The plug-in will connect your website to the OptinMonster web application. To complete the setup, just click on the OptinMonster menu item on the left-hand side of your WordPress dashboard and follow the instructions to connect your OptinMonster account.
Shopify Instructions
Shopify users don’t need to do anything additional other than creating their OptinMonster account for this step.
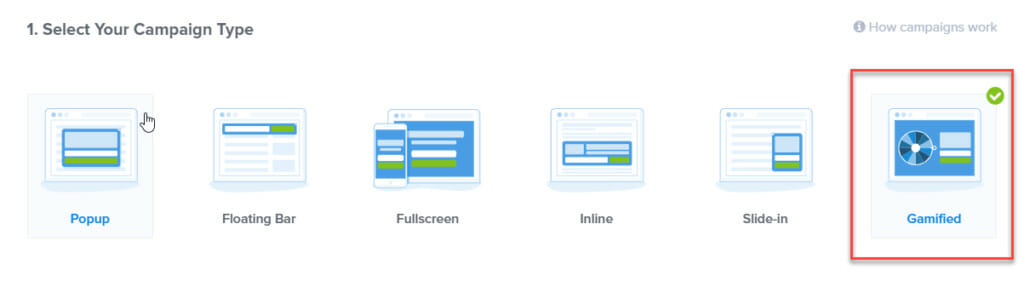
Step 2: Creating The “Spin-to-Win” Opt-in Campaign
Now that your WordPress website is set up, it’s time to log into the OptinMonster dashboard! once logged in, Click the green “create new campaign” button.
Next, you’ll want to select the “Gamified” campaign type.
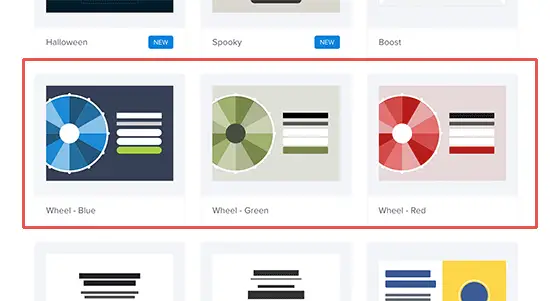
Now, scroll down the templates until you find the Spin-to-Win wheel templates.
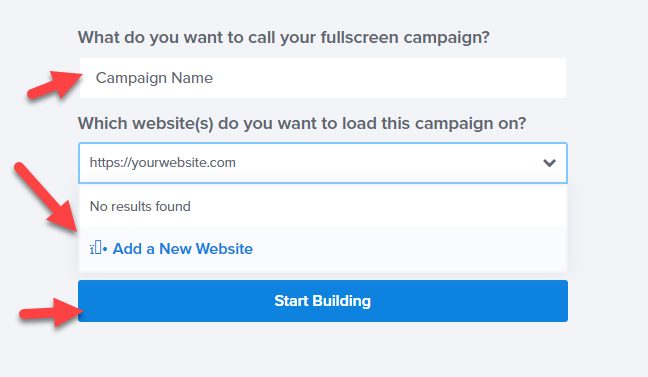
Follow the prompts on the screen to name your campaign and the website you want the campaign to display on. If you haven’t added one yet, then you can choose “Add a New Website.” Afterward, click the blue “Start Building” button.
You’ll be brought to the OptinMonster campaign builder interface.
Step 3: Edit The Wheel
Click on the wheel element and configure the colors, fonts, and other design aspects to your liking.
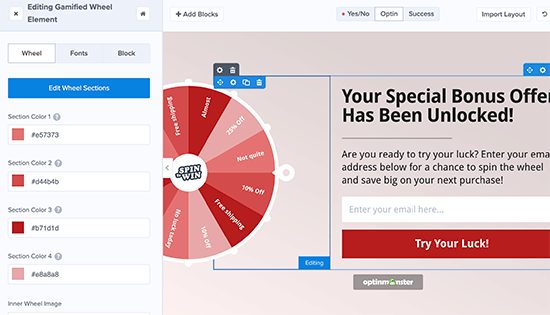
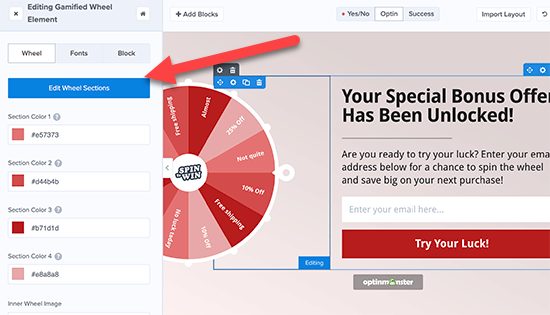
Next, click the blue “Edit Wheel Sections” button to change the values for the prizes available.
This area will allow you to add additional labels and coupons. It will adjust the “win chance” odds based on the number of options available.
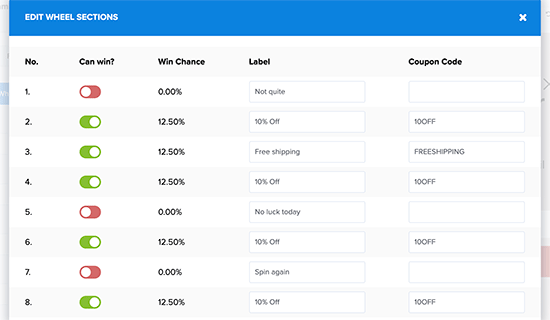
If you want some sections to not give anything, then make sure you flip the “Can win?” toggle to a red status.

Once you’re happy with everything, make sure you click the save button at the top to save all changes.
Step 4: Choosing Where To Display Your Spin-to-Win Opt-in
Now you need to choose where you’re opt-in will be displayed on your website or Shopify store. OptinMonster gives you many targeting options.
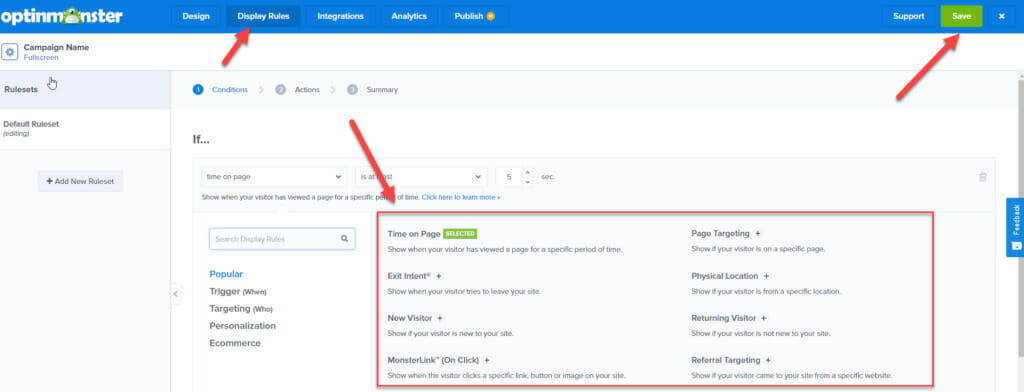
You can choose to display your opt-in sitewide, or only on specific pages. Just navigate to the display rules tab on the header menu, and begin configuring.
You can choose to display the opt-in when the visitor has been on a page for a specific amount of time, or you can trigger it when it looks like your visitor may be leaving your webpage Using OptinMonster’s exit intent technology.
Once you have this configured to display the way you wanted to be displayed, then you can click the save button again in the top menu.
Step 5: Choose Your Email Integration
Next, you want to select your email integration. This is the email service provider that you use to handle all of your email marketing. Just click on the Integrations tab from the top menu. If you already have one set up inside of OptinMonster, then you can select that one from the menu on the left.
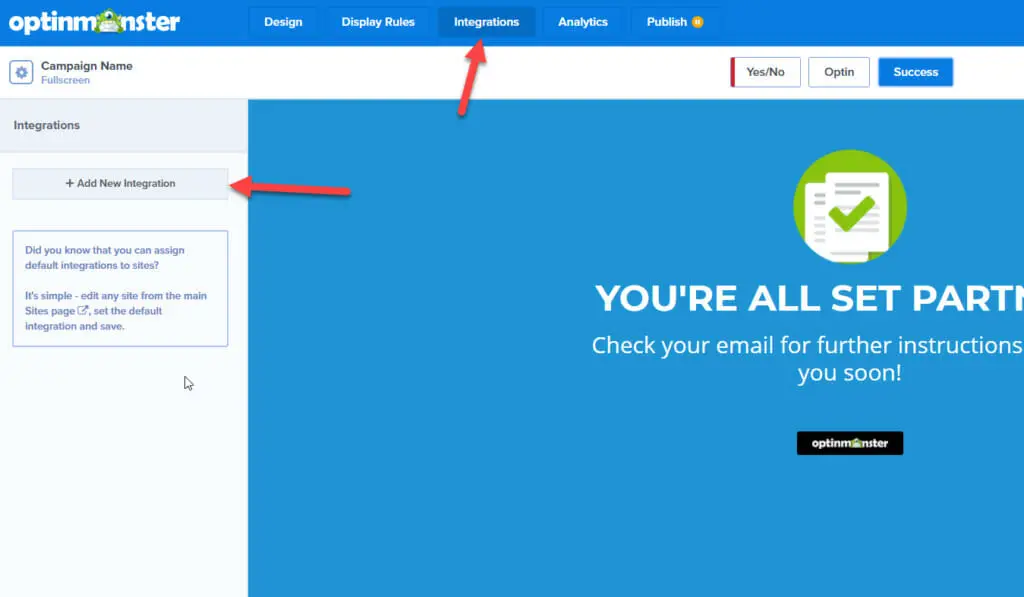
If you need to add one, then simply click the “Add New Integration” button from the menu and go through the setup steps on the screen.
Step 6: Adding The Spin-to-Win Opt-in To Your Website
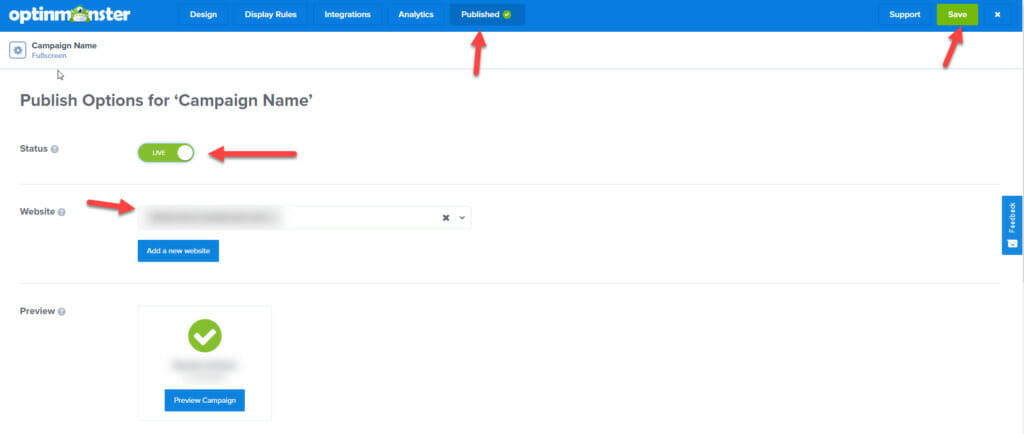
With everything now configured, it’s time to get the opt-in onto your website. You do this by going to the “publish” tab of the top menu.
Make sure you flip the “status” toggle to the green “Live” status. Ensure your website is listed in the website section of the publish screen. Once you’ve done that, make sure you click the save button.
WordPress Instructions
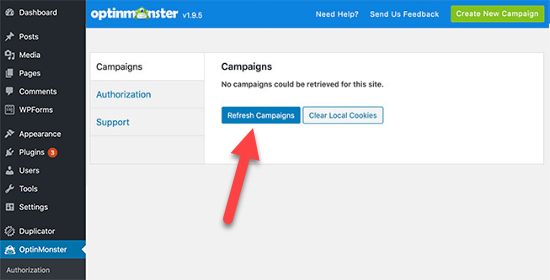
If you have a WordPress site, then go to the dashboard into the OptinMonster menu area on the left hand side, and under the “campaigns” tab click the blue “refresh campaigns” button.
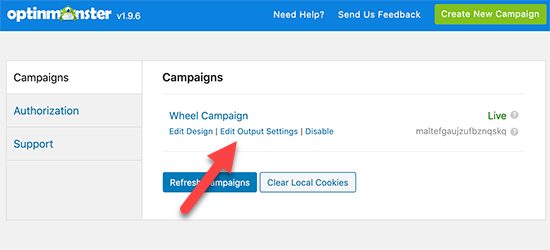
You should then see your Spin-to-Win campaign in the “campaigns” area. It should have a “Live” status to the right of it, but if it doesn’t simply go into the “edit output settings” option just below the name of your campaign and change the setting for displaying the campaign on your website.
Shopify Instructions
Now, if you are using a Shopify website instead of a WordPress website, at the bottom of the publish dashboard, You will see a section called “platform.” select the “any website” option. it will then display a snippet of JavaScript that you can add to your Shopify store. You can either do this in the Shopify admin under “customize theme,” or you can use a Shopify app to include the JavaScript snippet.
That’s it! You should now have a Spin-to-Win campaign displaying on your website.