The most success I’ve ever had with growing an email list has always been with the use of content locking. If you’re not sure what content locking is, make sure you read my article “What Is Content Locking?”
This article is all about how to grow your email list with content locking. If you’re not sure what content to lock or want ideas on the kinds of content that is worth locking, read my article “Content Locking Ideas.”
If you want to know how to lock content step-by-step, then you’re in the perfect spot.
See What Others Are Doing With Content Locking
Before we begin, I created a fun little gallery with three examples of content locking that I found in the wild. If you want a peek behind the scenes of these three websites, then make sure you grab it here:
[thrive_lead_lock id=’12487′]
[/thrive_lead_lock]
Locking Content to Grow Your Email List
Everyone wants to grow their email list, but few people would share their secret weapon. The method that has always worked best for me is content locking. I’ve been doing it since 2013! But times have changed, and the tools have only gotten better. So, how exactly do you lock content and grow your email list?
Step 1: Identify Good Content
Identify the content that is worthy of being locked up. Ideally, this content is unique to you, not just standard information that you can find anywhere.
When in doubt, create a content upgrade to make the deal even more ideal. At the beginning of this article, I offered a content upgrade for getting a sneak peek of what other people are doing with content locking. If you want more content upgrade ideas plus my #1 favorite kind of content to lock, make sure you read my “Content Locking Ideas” article.
Step 2: Sign Up For OptinMonster
OptinMonster is my favorite service for gating (locking) content. They offer a bunch of additional features including:
- Countdown timers
- Full-screen welcome mats
- Exit-intent popups
- And much more.
My favorite feature is that I get to build my content locker opt-in on their website in their interface. Not inside some clunky WordPress plugin.
Step 3: Create An “Inline Campaign”
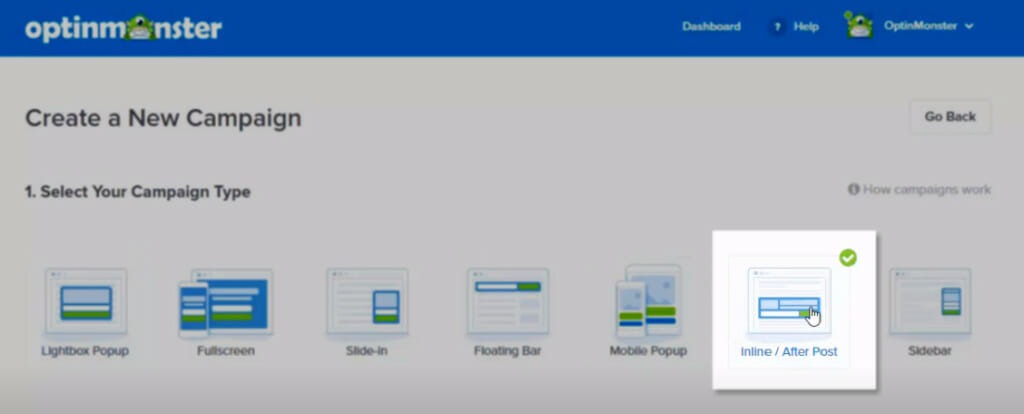
Don’t let the terminology scare you. An “inline” campaign just means that the content locker will be inside your article with your other text and images.
Step 4: Choose a Template From Their 35+ Template Library
Choose a template that appeals to you. There are over 35 as of this writing! You can simply hover over one and click “Preview” to see what it will look like before making your content locker.
Step 5: Name Your Campaign
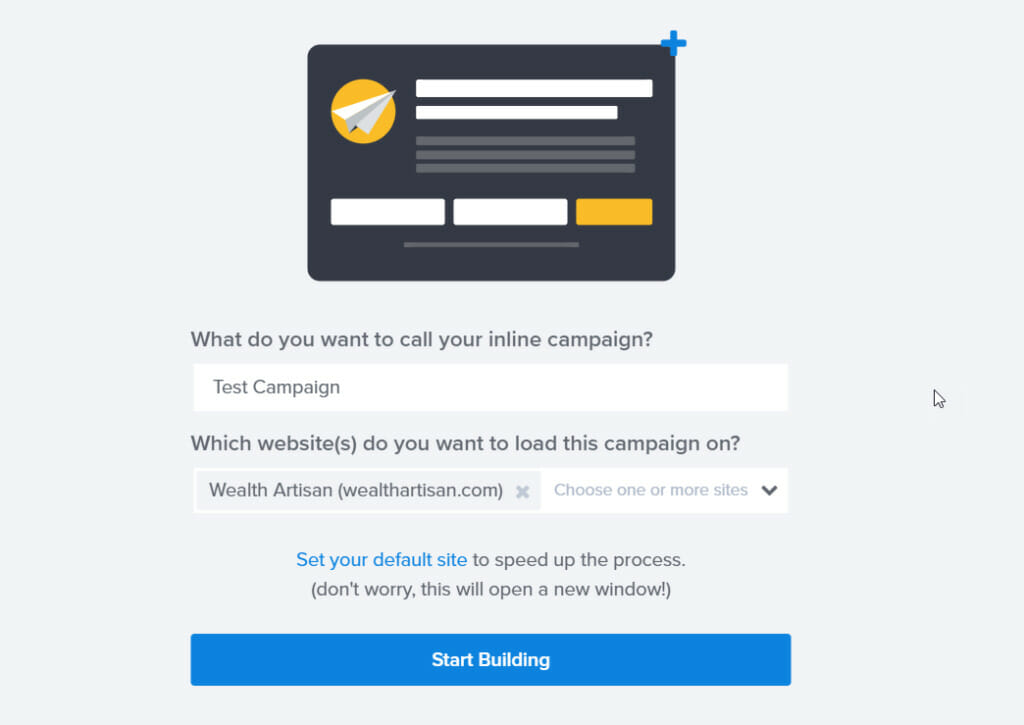
Name your campaign so you can identify it later. You can create all types of neat opt-in forms and pop-ups with OptinMonster, so you want to be clear with the campaign name if you’re going to make changes in the future. For now, you can name it something simple like “Content Locker Campaign.”
Step 6: Configure The Campaign To Block Content.
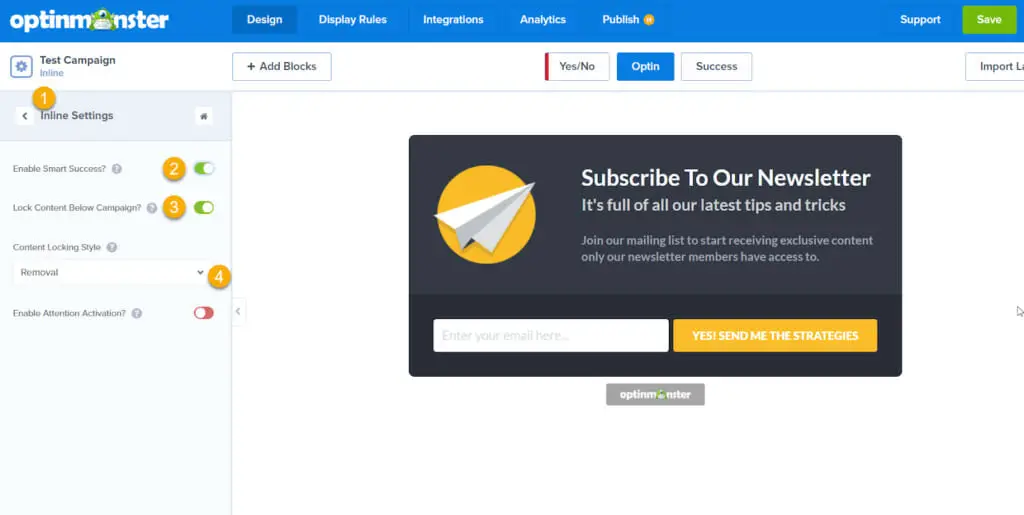
Now we get to the fun stuff. In this editor, you can edit the way the content locker will look, and the text you see. Once you’ve changed it to your liking, you can set the content locker up so it- well- locks content!
I’ll explain each number in the image above:
- Click on the “Inline Settings” option in the left-hand menu.
- You can choose to enable “Smart Success.” That’s what I do because if that visitor goes to another article with a content locker on your site, you don’t want to bother them with having to fill the form out again.
- Enable the “Lock Content Below Campaign” option.
- Choose whether you want to remove the content until it’s unlocked or obfuscate (blur). I like the blur effect, but it’s really up to you.
Step 7: Configure Your Email List Provider.
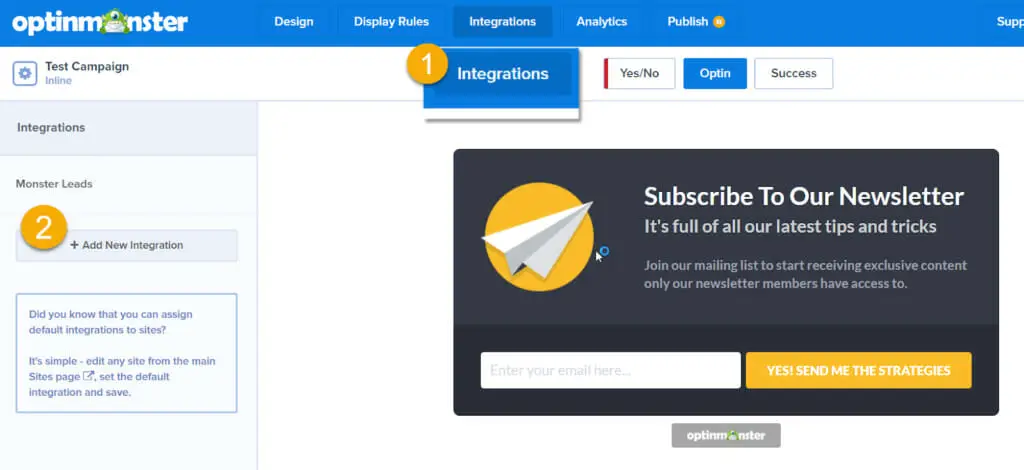
If you haven’t already, from the integrations tab (step 1 in the image above), click the “+ Add New Integration” button and follow the instructions for your email marketing provider.
Step 8: Publish The Campaign
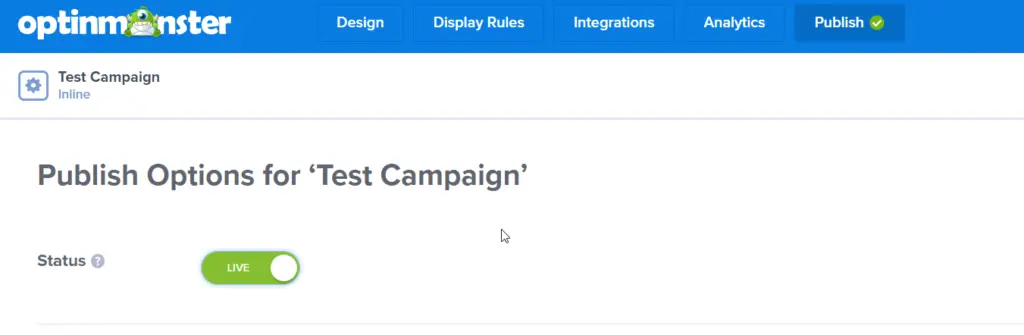
Next, on the Publish tab, flip the “Status” toggle from the yellow status to the green “Live” state.
Step 9: Save The Campaign And Get It Setup On WordPress
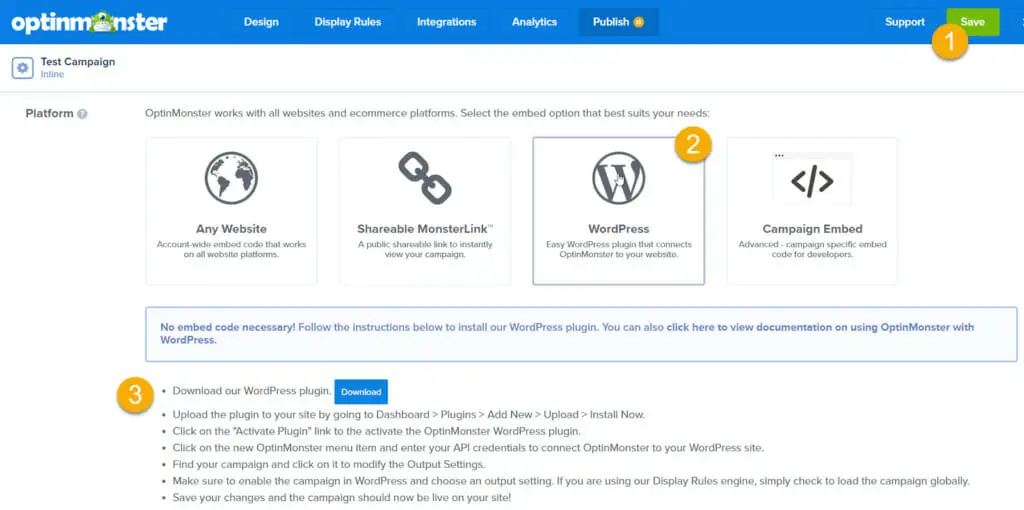
Click the green “Save” button (step 1 in the image above). Additionally, if you scroll further down on that page, you’ll see instructions on how to add this to your site. You can click any of the buttons to see how. For this tutorial, we’re using the “WordPress” tips.
You’ll want to install the OptinMonster WordPress plugin in your WordPress dashboard. You can see the blue “Download” button in the tips above (step 3).
Once you have the plugin installed and activated, you can proceed to the next step.
Step 10: Enable The Campaign In WordPress
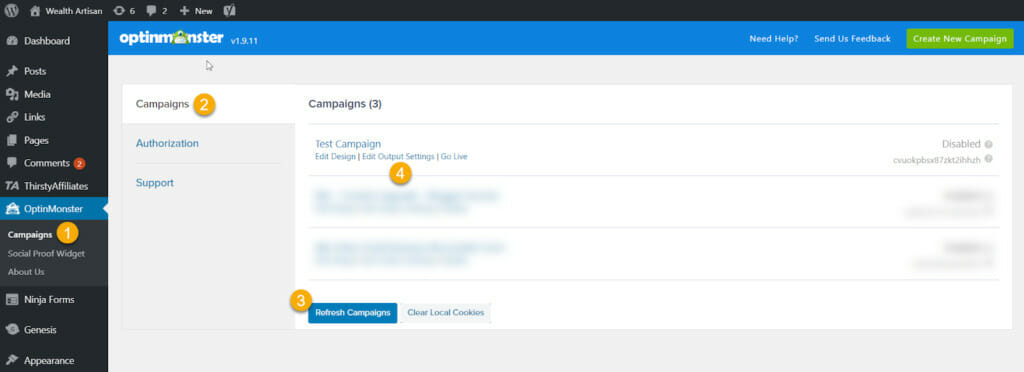
With the OptinMonster WordPress plugin installed (See step #9 if you didn’t install the plugin yet), you can now proceed. From the WordPress dashboard, click the “OptinMonster” menu option (step 1 in the image above). Make sure you’re on the “Campaigns” tab (step 2 in the image above). You may need to refresh your Campaign list (step 3 in the image above) if you don’t see your content locker campaign.
Once you see the campaign, click the “Edit Output Settings” link below the campaign name.

You want to make sure you enable the campaign (step 1 in the above image), then copy the shortcode using the “Copy to clipboard” button (step 2 in the image above).
Step 11: Add That Shortcode To An Article!
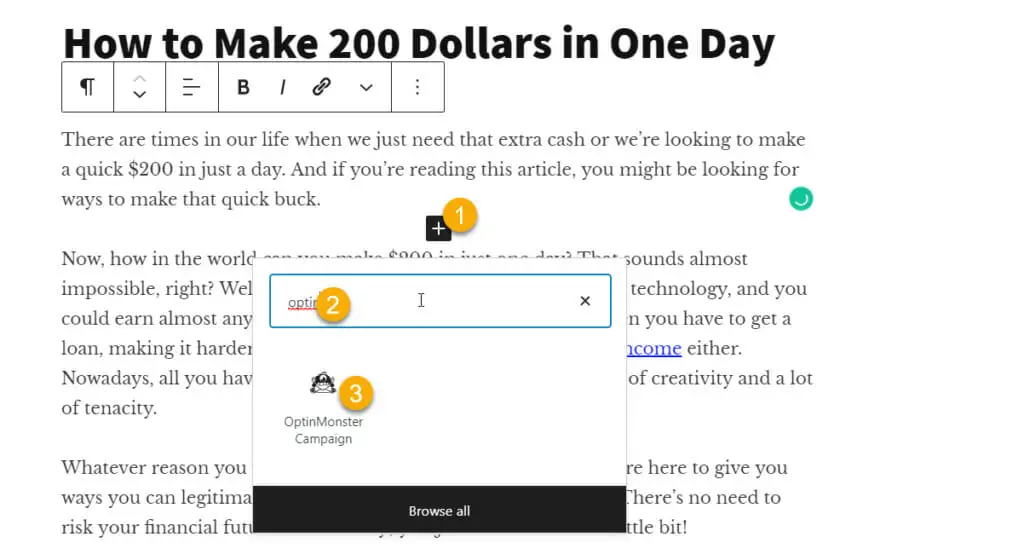
Now, you want to go to the article that you want to lock up and add an “OptinMonster” block to the article (which can be done using the steps above).
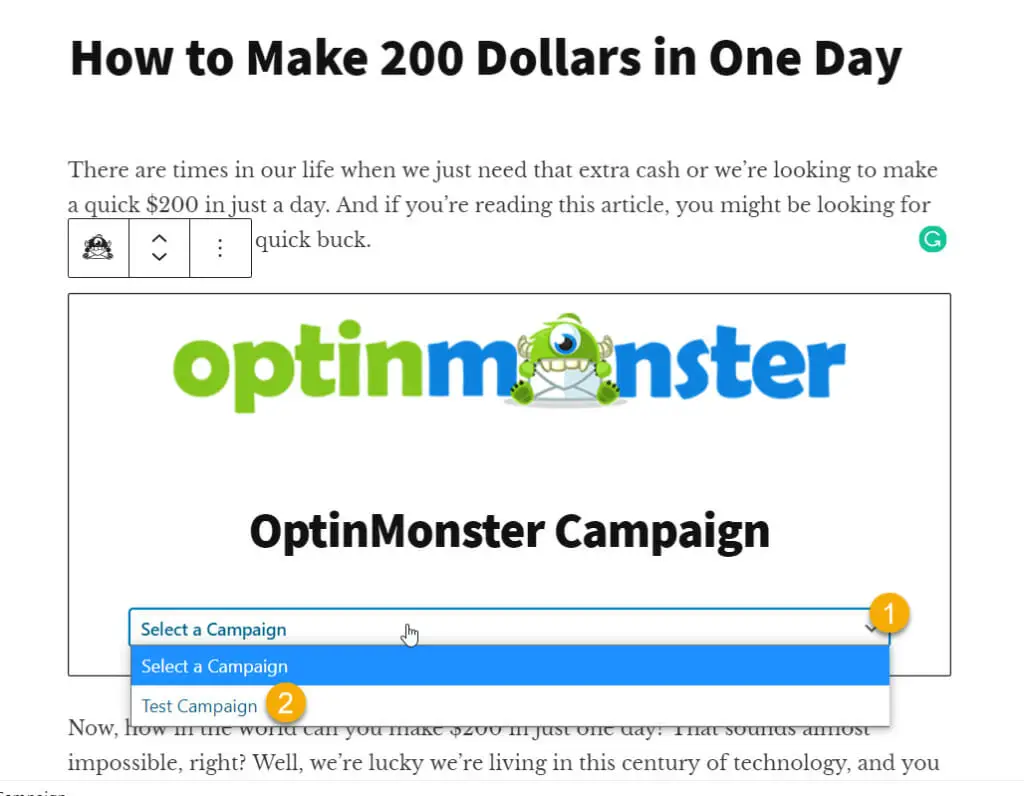
After adding the block, you should now see something similar to the above image. Select the appropriate campaign from the list, and this is what you’ll see:
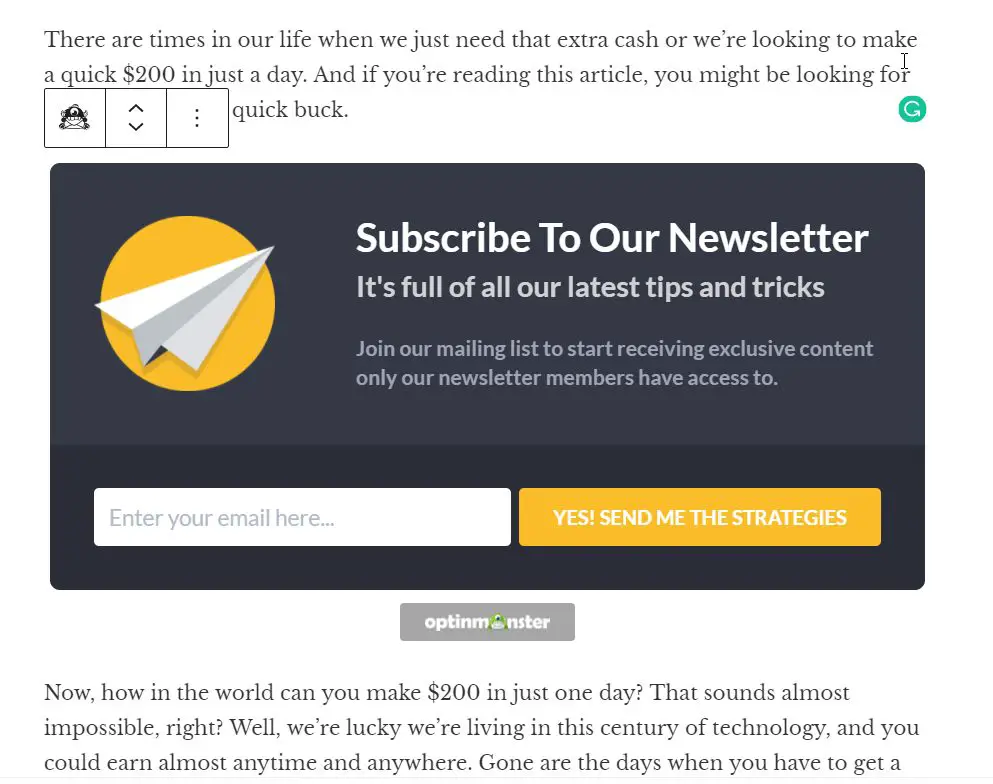
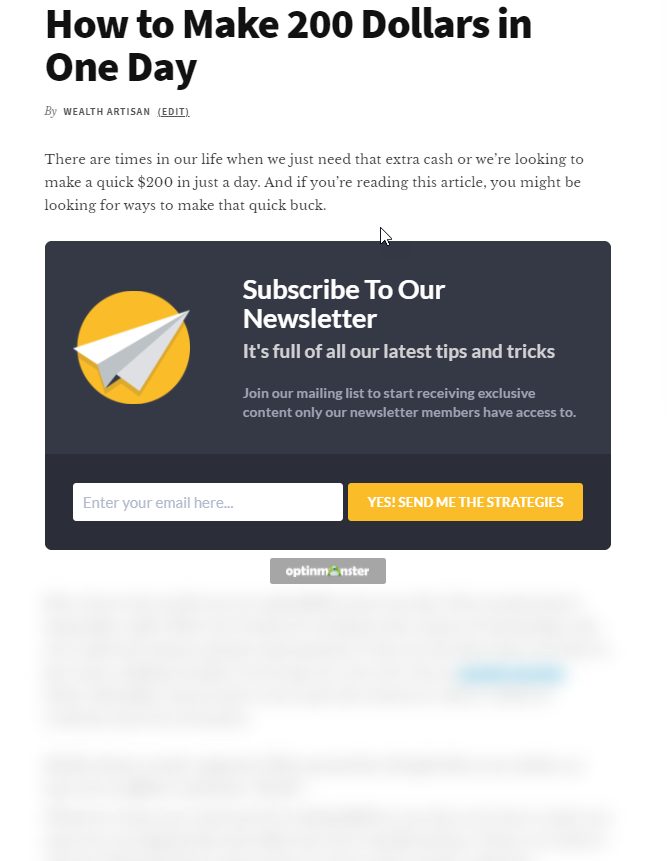
After a moment, you should then see your content locker. You’ll notice that nothing is locked. That’s OK. It doesn’t work inside the editor. If you preview the article, you should see something similar to this (if you chose to obfuscate as I did):
Next Steps: Get Started Now!
What are you waiting for? Don’t waste another second. Click the button below to sign up for OptinMonster and get this job done!
Conclusion
In this article, I walked you through the exact steps you need to follow to lock the content in an article using OptinMonster. This is a great way to grow your email list, and probably the primary way I’ve been able to build email lists for my websites. If you liked this article, make sure you share it on social media so others can benefit too!