Websites are easier to create than ever, but why does it seem like simple features like an announcement, or notification bar is so difficult? Seriously.
This is simple stuff.
So, what is the best way to easily add website notification bars to your website? No, I’m not just talking about WordPress, you can literally do this for any website on any platform! Follow these simple steps, and you’ll have one in no time!
Step 1: Create An Account
My service of choice is OptinMonster. I’ve used OptinMonster for years, and as I said, it works for basically every platform. Many of the solutions only work on WordPress, or they’re just plain complicated!
OptinMonster also has a ton of features, it’s not just a one-trick-pony! OptinMonster allows you to create pop-up lightboxes to collect email addresses from your visitors, they let you lock content (gated content) using in-line opt-in forms, and they also let you create these super-duper website announcement banners!
Step 2: Log into your account
We need to log into our account so we can complete the remaining steps. If you have trouble logging in, then make sure you’re using the correct username and password. If you are, then you can use the “forgot your password” link to reset your password. Alternatively, you can contact OptinMonster support through their support page.
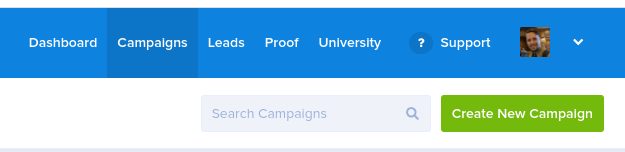
Step 3: Create a New Campaign
Once logged in, you just need to click that big, green “Create New Campaign” button just under the menu:
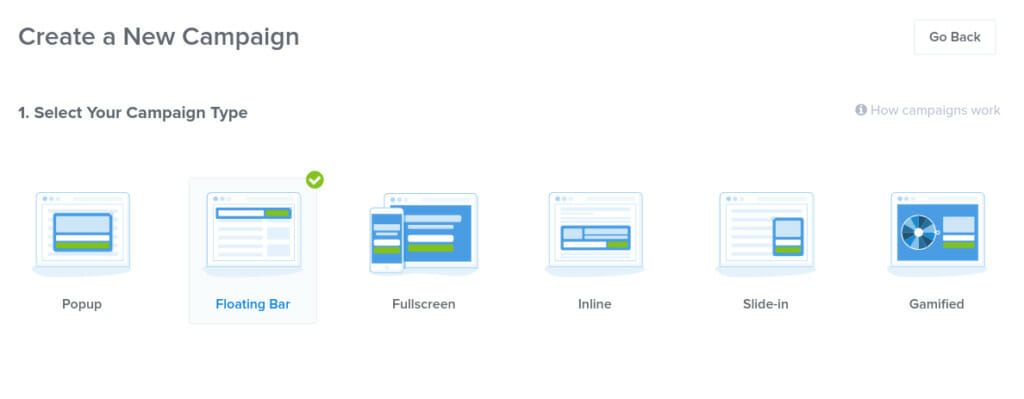
Step 4: Choose the Campaign Type
As you can see, OptinMonster supports many types of campaigns including:
- Popup
- Floating bar (the one we are using)
- Fullscreen
- Inline
- Slide-in
- and Gamified
For the purposes of this tutorial, we are using the “Floating bar” campaign to create our stellar alert bar!
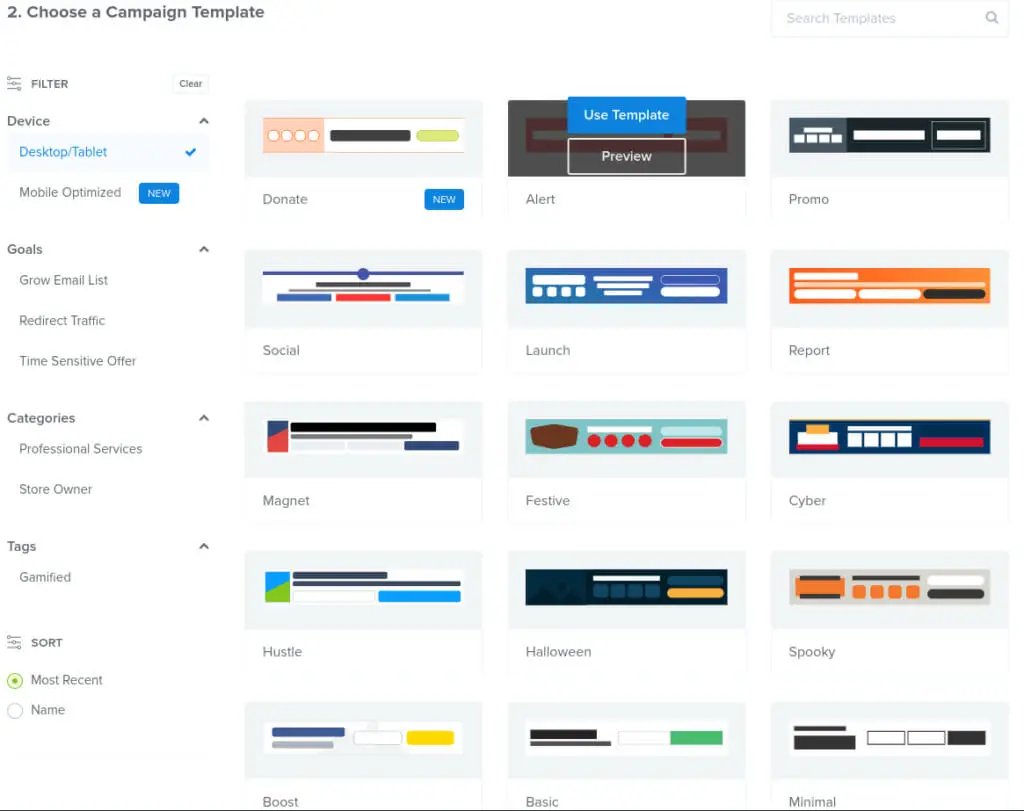
Step 5: Choose The Template
Now, we need to figure out how we want the bar to look. One thing I love about OptinMonster is that the templates are very flexible. You can pick whichever template works best for you, and modify it until it’s perfect.
You can change colors, add elements, remove elements, and edit text. You have complete control.
Pro Tip: When it comes to picking the template and editing how it looks you need to find a balance between eye-catching and blending with your website. I generally prefer to lean more towards eye-catching than worrying about blending in. This is a personal choice though. OptinMonster is flexible enough to do both.
I’m going to use that fire-engine red one for this tutorial. So, I’ll hover over it, and choose “Use Template.” If you’d prefer to preview, then you can click the preview button.
Step 6: Name the Campaign, Select Website
On this step, choose a name for the campaign. If you have a naming convention already, then stick with that. If not, simply call this “Alert bar.”
Next, you need to select the website this notification bar will appear on. If you have no sites in the list, then select “Add a New Website.”
Now, click the “Start Building” button.
Step 7: Make the Notification Bar Amazing!
Now comes the fun! Customize the bar to your liking. This is what I ended up with:

I don’t care as much about looks as I do functionality. You can make yours as beautiful as you want. I sometimes prefer the garish approach.
Editing the Text
To edit the text, just click the text box (or button) you want to edit, and change the text in the panel on the left-hand side of your screen.

Changing the Background Color
Changing the background color is very simple. Just click on the “Optin Settings” menu option in the left panel, click the “Optin View Styles” option, then you’ll see the option to change the background color:

Step 8: Save and Publish
Next, you want to click the green “Save” button, then click the “Publish” button. You will then be taken to this screen.
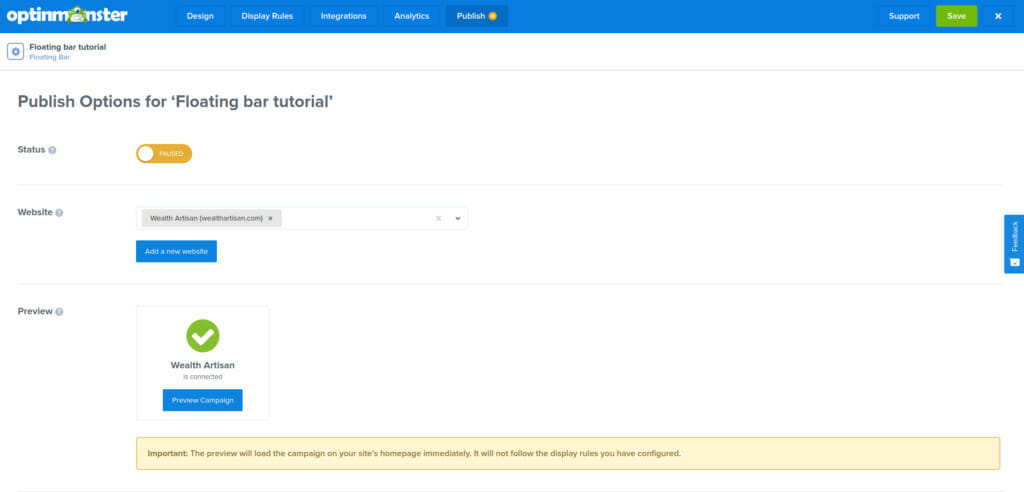
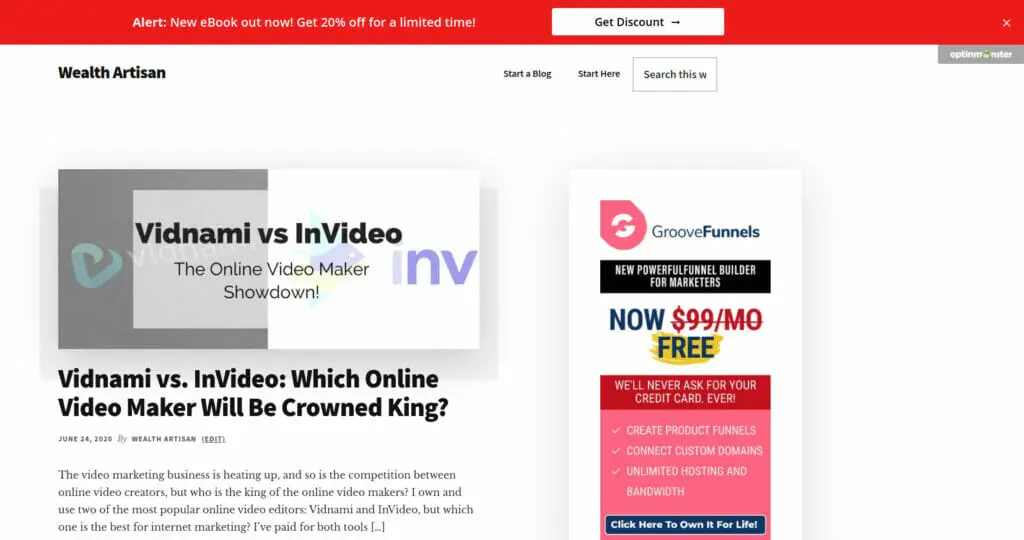
If you already have your website connected, then you can click the “Preview Campaign” button to see what it will look like on your site:
If you like how it looks, then you simply flip the status switch from the orange “Paused” status to the green “Live” status and click the green “Save” button.
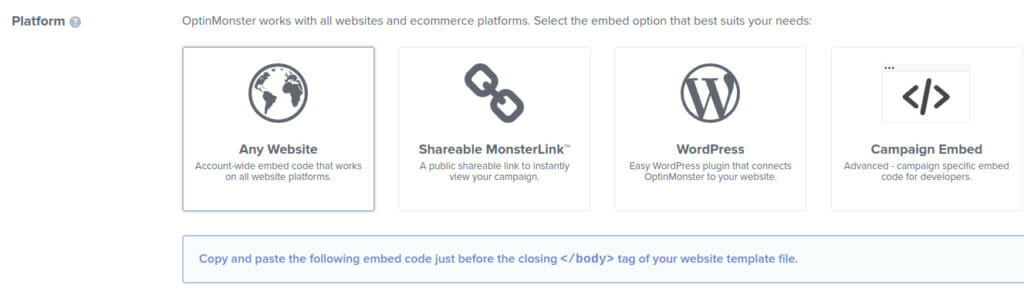
If you’re at all unsure of how to include your new notification bar on your website, then make sure you take a look at the bottom of that page, and you’ll see this helpful section:
Additional Resources
Now, if you’re new to OptinMonster, then chances are, there are more things you’ll want to know. I’m including a bunch of helpful resources here for you so you can learn all you need about your new OptinMonster account.
OptinMonster Video Tutorials
If you’re anything like me, then I much prefer learning with video. OptinMonster has hundreds of short, to-the-point tutorial videos to teach you everything you could possibly want to know about OptinMonster. You can find OptinMonster’s YouTube channel here.
OptinMonster Documentation
If you can’t find a video for the exact question that you have, then I highly suggest checking out their documentation site. I have been in there a few times for more technical questions that I want to solve on my own, but couldn’t find a video for.
OptinMonster Support
Finally, if you can’t figure something out with the above resources, then contact their support team. I’ve only had to contact them twice, but both times they were very helpful and answered my questions quickly.
Website Announcement Bars Wrap-up
In this article, I showed you how easily and quickly you can set up an announcement/alert bar on your website. This works for pretty much every platform, not just WordPress.
If you haven’t yet, what are you waiting for? Get your OptinMonster account using the button below and don’t waste another second!
If you found this article useful, then please give it a share on social media, that helps me out, and it helps me help other people. Have a great day!